Now that the materials were here, all I had to do was measure out the exact building lines, mix a load of mortar and start to build.
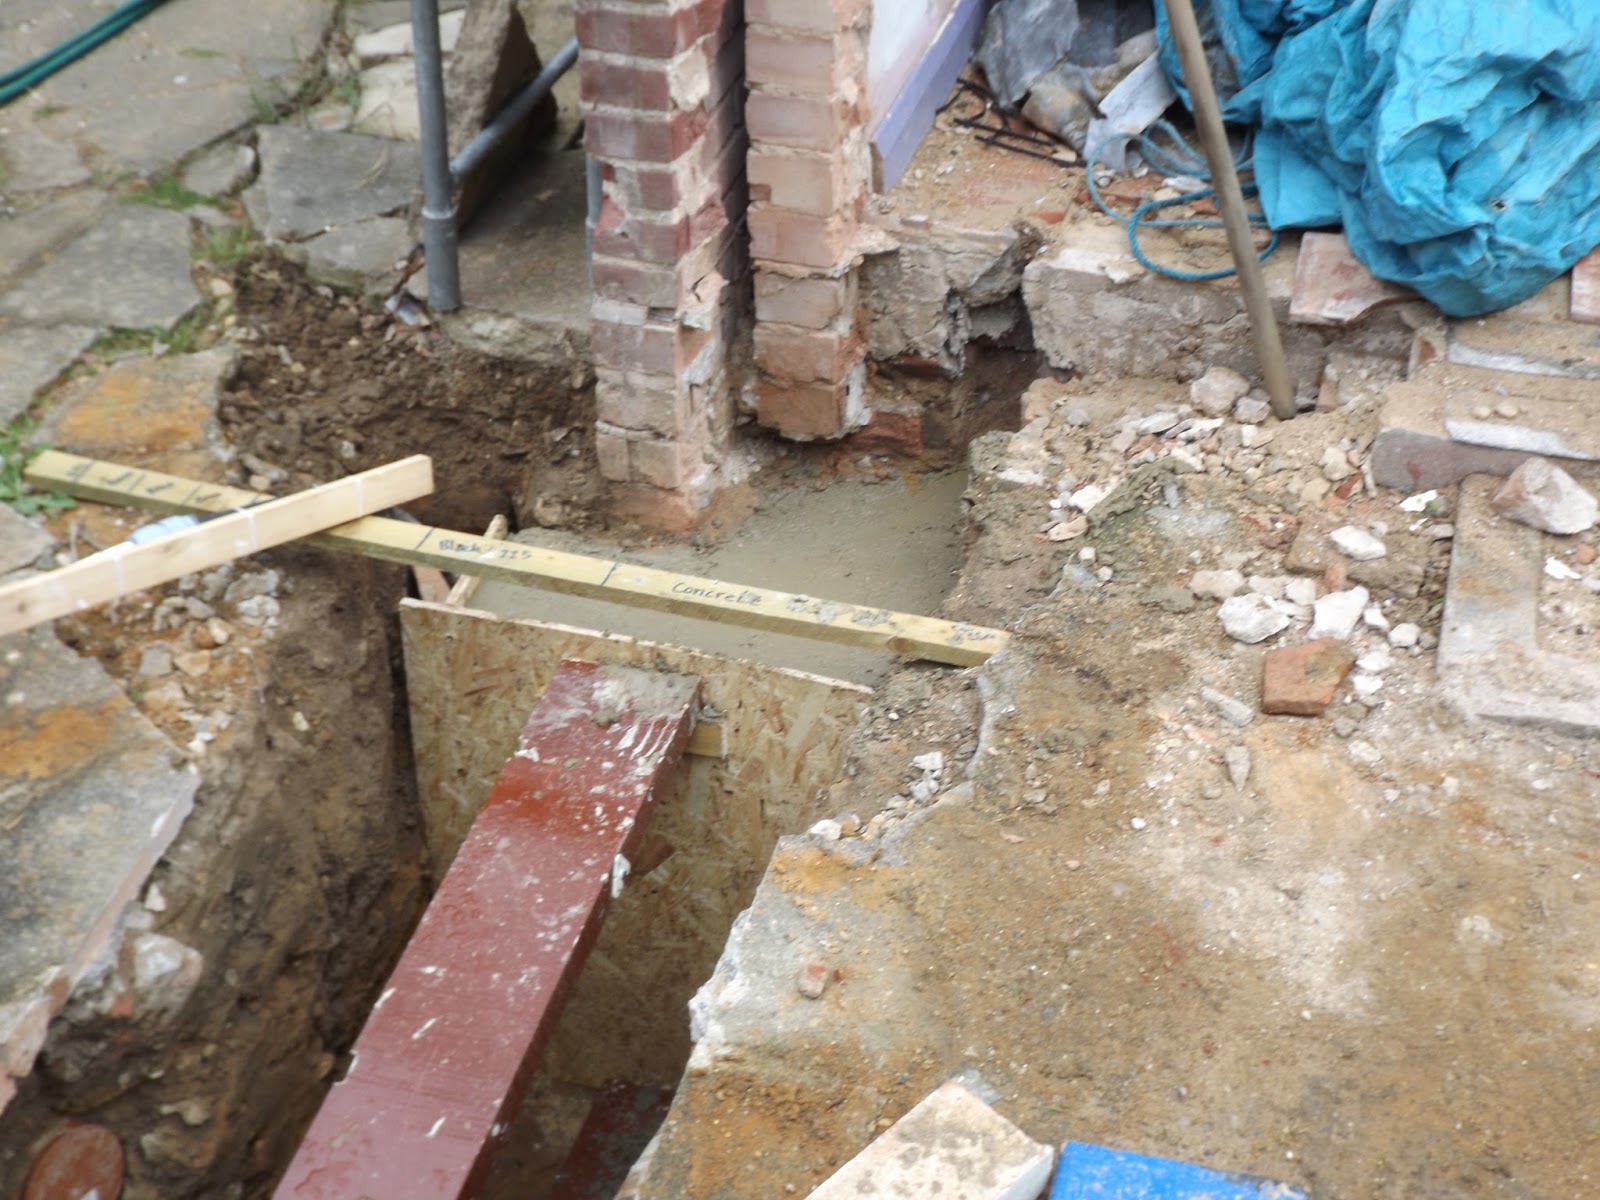
 People have told me that the first few blocks, working below ground level, are the most difficult. I spent a long while getting lines and levels right, and started with the corners, ensuring I got the levels right to match with the existing Damp Proof Course.
 I started with the medium density concrete blocks for just the outside skin and ensured that the blocks were vertical, straight and level; that the corners were at right-angles and the three lines between the existing damp courses and the new blocks were level.
 A 5:1 mix of sand to cement meant that I was using 2 1/2 bags of sand to 1/2 bag of cement in the mixer. I had forgotten to get any plasticiser, but I shall remedy that tomorrow. Actually the blocks went down very easily and needed little adjustment; probably because of the time and trouble we took getting the foundation concrete level.
 Before I did the blocks I decided to remove the old cast-iron soil pipe, a job I had not been looking forward to, partly because it is so heavy and partly because even at the top of my scaffold tower the top was out of my reach and would likely come crashing down onto the scaffold sending me catapulting into next-door's garden.
In the event a few blows of a large lump hammer shattered enough of the pipe to make the remaining section less of a threat. It came down easily, thanks to Newton's discovery. The only bit that put up any real resistance was the connector into the bathroom which needed digging out with a chisel. So I am very relieved have got rid of it and bricked up the hole in the back wall.
We are very fortunate in Norwich to have a wide range of builder's merchants, all of whom would be delighted to fulfil my requirements for blocks, sand, cement and the vast range of associated bits and pieces I will need.
 Not all of them have a good web-presence with online shop so I could compare prices, but those who did were remarkably varied in their prices. For the pallet of aerated blocks, pallet of medium-density blocks, sand and cement the prices
ranged from £502 to £740.
Not all of them have a good web-presence with online shop so I could compare prices, but those who did were remarkably varied in their prices. For the pallet of aerated blocks, pallet of medium-density blocks, sand and cement the prices
ranged from £502 to £740.
Needless to say I chose the £502 that Wickes quoted - including delivery and vat.
 My task was to remove the 200 or so blocks along with the sand and cement from the drive, to the back of the house and stack them all in an ordered and useable manner without them getting in the way.
Space is somewhat limited around the extension and drive, and I don't want to have to move things twice if I can avoid it.
I can't fault Wickes at all.
They sent me a text to confirm the date of delivery and the time-slot. They rang to give me 30 minutes' notice and sent a confirmation text afterwards.
 The supplies came on 4 pallets:
- 2 pallets of medium-density concrete blocks - 176 in total
- 1 pallet of 100 Celcon aerated blocks
- a mixed pallet of 200 bricks, 25 bags of building sand and 5 bags of cement.
It was a challenge unloading them using the hydraulic lift on the back of the truck because of the telephone wire overhead.
The driver was very skilled and managed to weave around it - even removing the Celcon locks from the pallet for me so I had one spare to move the blocks onto.
 Then I moved them: 176 x 20kg blocks, 100 x 5kg aerated blocks, 200 bricks, 25 x 25kg bags of sand and 5 x 25kg bags of cement. Total weight?
5 tonnes of building supplies.
All now neatly stacked waiting for me to have a free moment to start mixing mortar and laying blocks.
With the two ends of the trench shuttered to form buttresses to stabilise the existing foundations, we were ready for the remaining 3 cubic metres of concrete to be delivered.
It should only take half an hour to unload that amount - even by barrow as the truck can't get close enough to the back of the house.
 First though pegs were needed to mark the level along the trench. As they are not supporting anything I have deliberately not put them in too far so I can remove them easily when we have the level - well, that's the theory anyway.
I placed them about 1m apart so my long (120cm) level could sit on two. Then I laid a string across the top from one end to the other and it just touched the top of each of the intermediate posts.
 The concrete will cost £360 and be delivered at 3:30 on Thursday so I have lined up some willing volunteers to help with the lugging.
My question to the concrete company was, "What happens if it rains?" "You get wet." was the reply - apparently concrete 'goes off' better in water than in the dry. I thought we'd have to postpone or cancel, but they were confident that we would be able to go ahead whatever.
 Despite having finished digging the trench, lots of little bits needed doing to prepare for the Building inspector's first site visit;
- the few remaining bricks needed clearing from below floor level on the party-wall side
- the gap between the two sets of foundations needed clearing out
- the water pipe needed to be moved, reattached and secured
- the foundation on the driveway side that had been damaged in the water leak needed to be cleaned and supporting
- the exposed rebars needed to be cut through where they met the rest of the foundation.
 All of these took time and, although each job didn't show much in terms of progress, the result was that on Friday, June 19th the building inspector viewed the trenches, agreed with the planned shuttering to support the ends of the existing foundations and gave the go-ahead for pouring the footings. I was fearing the worst but the inspector rang me twice; once to say that she had visited the house, looked at the work and, having taken some photos, just wanted to discuss with a colleague about the ends of the trench and how to support the old foundations, and later on to say that the proposals I had put for supporting the footing was fine and I could continue.

As there were two ends to do first I shuttered and braced them and, having bought 24 bags of ballast and 4 bags of cement, started mixing about 0.7 tons of concrete to stabilise the ends and give a continuity between the old and new foundations.
 I filled a bucket with cement until it weighed 12.5kg - half a sack - and marked the bucket with a line to show where to fill it to. This would help to speed up the mixing process. my mixer will take 3, 25kg bags of ballast along with the half-bag of cement to make a 6:1 concrete mix. The bucket did its job and ensured that all the mixes were the same ratio and a consistent strength.
As it turned out I only used 21 bags of ballast and had very little left over. The stand for my mixer is rather rusty and needs repairing or replacing. I'm not sure my welding skills are up to the task, but I shall get some steel plate and give it a go during the week.
 I will leave the ends to set for a couple of days before I remove the shuttering and arrange to get the remainder of the concrete delivered.
 I could mix it by hand I suppose. After all the trench is only 10m long, 600mm wide and needs to be filled to 450mm deep. by my reckoning that's 2.7 cubic metres of concrete - somewhere around 3 tons.
That's over 30 mixer-loads - all to be loaded by hand and poured before it sets - I don't think my mixer would manage it!
So the next challenge will be to organise a delivery of readimix to coincide with the availability of two or three barrow-toting friends to help transport it from the lorry to the trench.
I'd like to think that I have finished the foundations today, but having marked a set of sticks with the appropriate depth markings and taken yet more sand from the trench I am left wondering whether the Building Inspector will be satisfied.
I had bought two blanking plugs to seal off the two drains that I would be disconnecting: the old soil pipe from the bathroom and the drain under the outside tap. I had temporarily used one of them to cap the new soil pipe until I finished it off and attached the final piece and wall bracket. So before I could cut through the drains i had to finish the soil pipe.


I don't like being up ladders when it is so windy, however I managed without being blown over and I am pleased with the outcome.
Once I had both blanking plugs I could cut the old drains and fit them to seal the drain chamber. Fortunately both pipes had been changed from clay to plastic about 10 years ago when we had a broken drain and it was easy to remove the couplers so they came free.
The big question is going to be whether the existing foundations are adequate. I must say they do look remarkably narrow and shallow compared with what I have had to dig out and i can't really believe that the building inspector will be happy with them, but we will wait and see. My trench is at least half a metre deeper than the existing foundations
I imagine i may have to under-pin the ends of the existing footings to prevent them from moving so we don't get any cracking in the walls.
 I really hope I don't have to dig too much more out because I don't know where I'll put it. I think I may well get a skip before taking up the floor slab since that will produce a couple of tons of concrete bits and rusty reinforcing bars. Here's a couple of pictures of the development of the spoil heap during the day. There is no barrow-access to most of the trench every shovel-full of the soil/sand has to be thrown over the supporting boards from a depth of 1 metre down.
Note the scaffold-tower sections being used as a safety barrier to stop people falling into the moat and the jury-rigged gutter fro the car-port roof. Thank goodness for zip-ties,
 The trench gets deeper and longer and the piles grow larger.
The concrete took a bit of bashing to clear the corner, and the depth of the trench coupled with the height of the retaining board makes it hard work clearing the sand from the bottom of the trench.
I am trying to keep the top 12" of topsoil separate from the remaining 2' of sandy gravel - I hope there is a point to it later on, and that I don't simply fill a skip with the lot.
I also wonder whether it is possible to use the sand if it is sieved and washed - surely it can't be very different to the sand I will have to buy. I don't mean for anything structural, but if I am laying any slabs and need a concrete mix could I use it?
 Eventually I will open up the ground at the end of the two existing sets of foundations and see whether they will be reusable or not. Obviously they have both had (or still have) 2100mm walls built on them so they are perfectly capable of carrying that loading and have been so for 50 years. But whether that is acceptable to the Building inspector I don't know
I think there is a particular way in which new foundations need to under-pin existing ones to prevent movement/settlement cracks but I'm not sure about that. Still I'm digging in sand which is coming up easily so it's not a major task even if I have to go down another 30cm or so.
 People have told me that the first few blocks, working below ground level, are the most difficult. I spent a long while getting lines and levels right, and started with the corners, ensuring I got the levels right to match with the existing Damp Proof Course.
 I started with the medium density concrete blocks for just the outside skin and ensured that the blocks were vertical, straight and level; that the corners were at right-angles and the three lines between the existing damp courses and the new blocks were level.
 A 5:1 mix of sand to cement meant that I was using 2 1/2 bags of sand to 1/2 bag of cement in the mixer. I had forgotten to get any plasticiser, but I shall remedy that tomorrow. Actually the blocks went down very easily and needed little adjustment; probably because of the time and trouble we took getting the foundation concrete level.
 Before I did the blocks I decided to remove the old cast-iron soil pipe, a job I had not been looking forward to, partly because it is so heavy and partly because even at the top of my scaffold tower the top was out of my reach and would likely come crashing down onto the scaffold sending me catapulting into next-door's garden.